

Our little nipper has turned 9 months this last week! Out almost as long as he was in. Of course I had a lot of plans craft wise of things to make after he was born, but then life sort of got in the way and everything still stands as a seed of an idea in my (what is still) baby brain.
One thing I have managed to complete, and probably what was the biggest project, is a keepsake picture frame of all the cards we received when he was born.

It took about a week or so all in all, made in nap times and when he was happily amusing himself, or whilst at the grandparents. I'm so looking forward to hanging it in his room when we move home (currently renting where we can't hang anything).
So if like me, you really struggle throwing greeting cards from special occasions away then you'll probably have almost everything you need for this project.
What you'll need
• Box frame in the style and size you love
• Stick glue
• PVA
• Circular paper punch
• Scorer (or something that will do the same job)
• Collection of greeting cards

I'm a real sentimentalist, romantic and planner, yet I'm also riddled with procrastination too, so I have gift bags full of stuff that I want to put together one day, wedding stuff, Mother's Day stuff, baptism stuff.... you get the picture. I'm so glad I finally got round to completing this project, though. It's been one of my favourites so far.
Right then, lets get started.

I cut the fronts off the greetings cards and saved the messages inside, I'm pretty sure little bubba will enjoy reading through them when he's older.
You'll need four punched circles for each (I'm gonna call them) dome, I found it easiest to punch out one card at a time and make the domes, then go onto the next card.

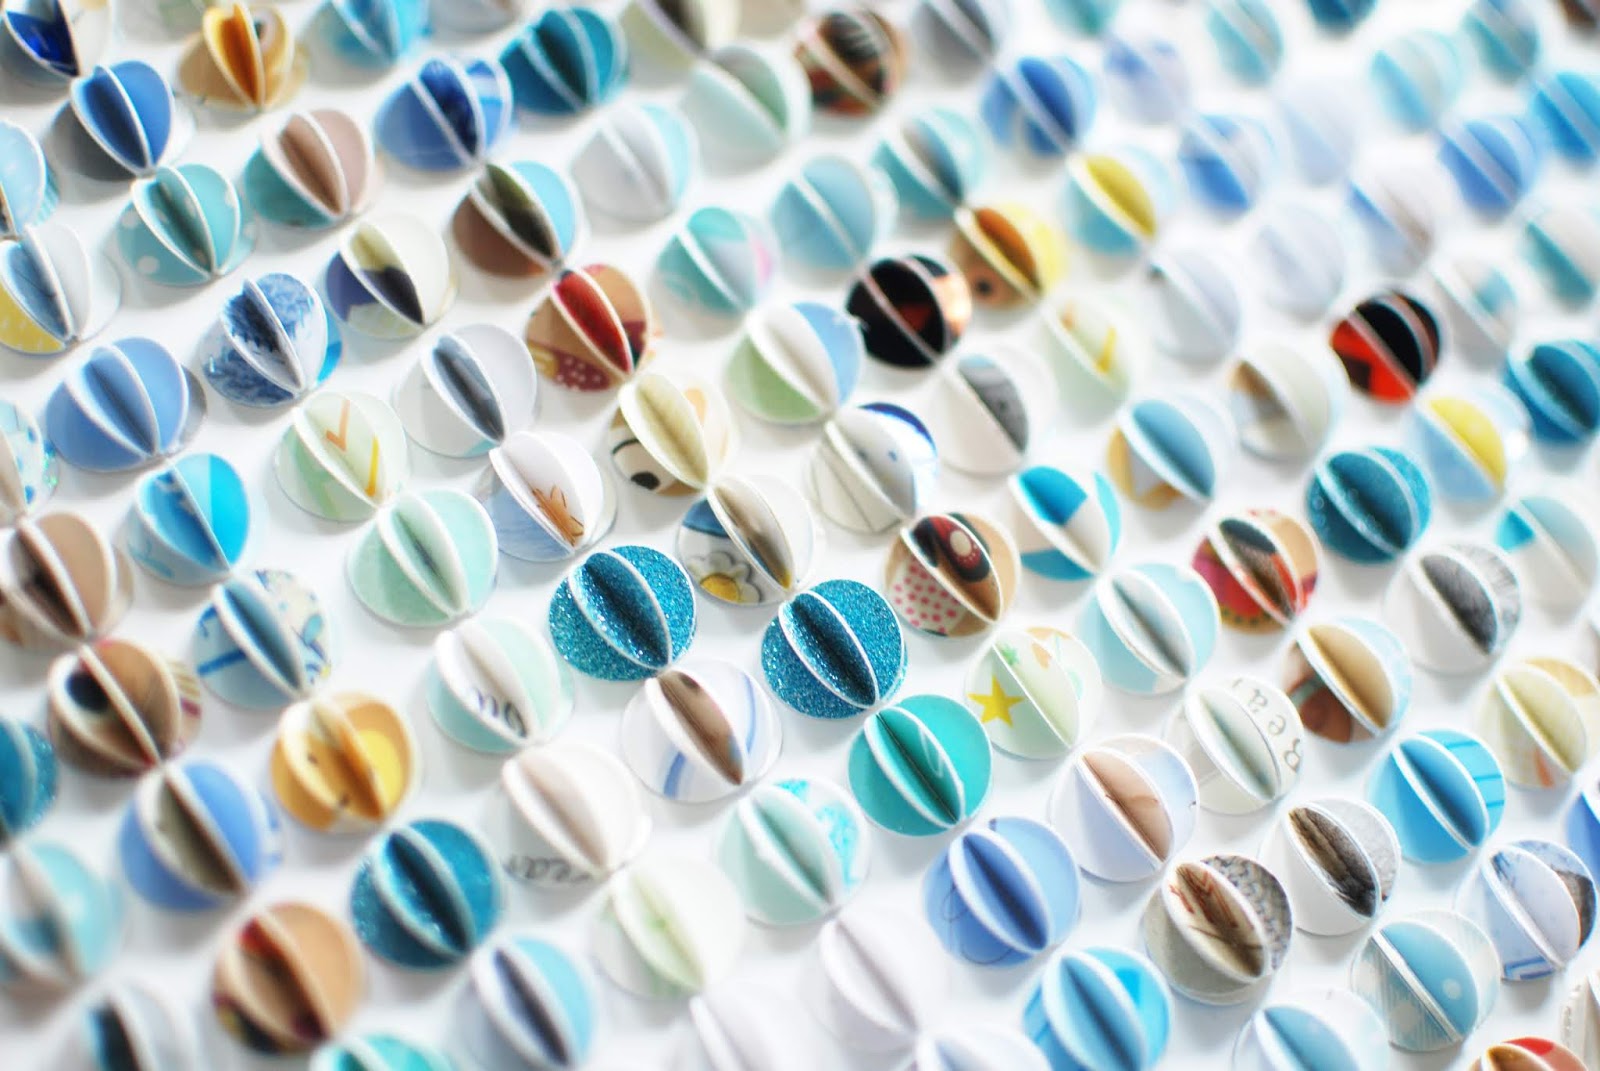
First off, score a line down the centre of each circle on the front facing side. Get two circles folded in half and glue one semicircle as pictured, so they're still circular, but have a point in the middle. Use your stick glue for this one, it's not mandatory lol, but I found that using PVA to glue the domes just took forever to dry. We'll use the PVA later for gluing them down into the frame.
Do this again to create the other half of the dome. Then add glue to one semicircle and adhere both sides together as pictured. Then, take another punch circle and glue to the bottom so that the dome holds its shape better and does not keep folding itself up (you'll see what I mean as you're making them).

After a while it's a good idea to start laying out your domes on top of your box frame. The amount you'll need will depend on circle punch and frame size. It's also pretty cool because you can then decide what sort of layout you like best and how many more domes you need to make. It's funny because whilst working on this baby memory project, it didn't occur to me at all that I should use any other layout than just a full on 'fill the frame' delio. You could arrange them in a circle, a spiral, maybe even your child's name, up to you.

Like I said, this project took around a week but it was in my spare time (if that's a thing when you have a little one in tow), when the baby was napping or at his grandparent's and when he was happy to just sit with me and watch. I'm not sure I'd recommend trying to knock it out all at once as I'll be honest, after a while you sort of get a tad sick of those little circles! Defo one for while you're watching Eastenders though!
Once you've made enough and are happy with your layout then it's time to start sticking to the frame innards (totally cannot think of the word for the bit we're using, here). If you're a bit more of a forward planning type than me, you'll probably have thought of using the innards to layout your design sooner, rather than using the glass on the frame and having to redo it!
If not, then don't worry, it doesn't take too much to lay them out again (honest). I used my PVA here to stick the domes down. If you're using a layout like mine then it's a good idea to get the outside rows stuck down first and work inwards, that way you know you have it straight already.
Make sure that when you place the frame over the top that you have enough clearance at the sides and your domes don't get squashed (along with your spirit).

Well, that wasn't too bad was it? I hope you're happy with your finished project, I'd love to see your designs so why not leave a link in the comments for us all to see.
Enjoy.

Comments
Post a Comment